We were able to do some really fun dinosaur themed sensory play this week. These included playing with "fossil dough," dunking dinos in cornstarch and water "sticky mud," and hatching dinosaur (ice) eggs. Read on below for more info!
Fossil Dough
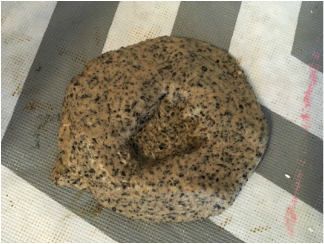
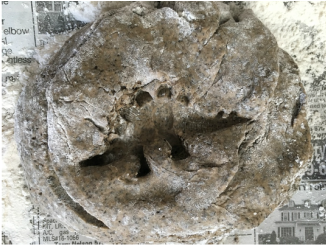
I originally planned to make "fossils" with homemade play-dough this week, but when I came across this recipe for "fossil dough" from Nuttin' but Preschool, I thought I'd give it a try. The dough was really simple to make from a mixture of flour, salt, used coffee grounds and cold coffee.
There were several things I really liked about this recipe:
There was one thing I really didn't like: it was super sticky! But I wonder if I may have made a mistake somewhere in the recipe. The recipe had enough "up sides" that I would definitely try it again and see if it was a bit less sticky. Rather than starting over, I just added some extra flour and kept our "work surface" floured, as if we were making cookies.
There were several things I really liked about this recipe:
- It was easier for little hands to mold, play with, and make imprints in than play-dough
- It had a gritty texture and interesting smell thanks to the inclusion of coffee
- It looked like rocks/fossils which was great for dinosaur week
There was one thing I really didn't like: it was super sticky! But I wonder if I may have made a mistake somewhere in the recipe. The recipe had enough "up sides" that I would definitely try it again and see if it was a bit less sticky. Rather than starting over, I just added some extra flour and kept our "work surface" floured, as if we were making cookies.
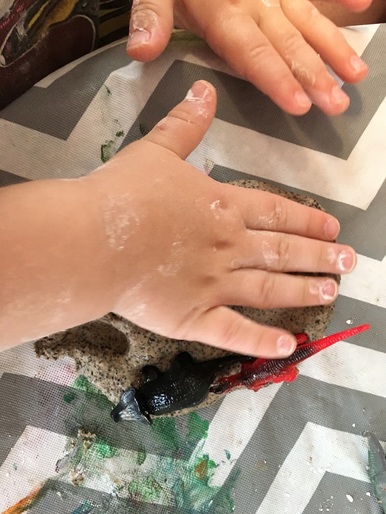
We stamped the feet of large dinosaurs into the dough, made imprints of entire small dinosaur figures, and just rolled it and played with it too.
 |  |
Dinosaurs in Sticky Mud
I saw the idea for dinosaurs in "sticky mud" featured on several websites, but it seems to have originated at Fun at Home with Kids. The activity was so simple to set up and my toddler went crazy for it!
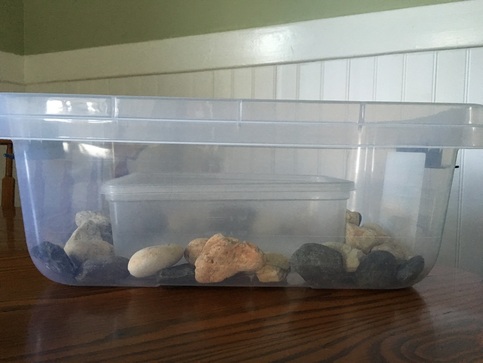
First, I prepared a double sensory bin - a bigger bin on the outside with a smaller one in the middle. I filled the boundary between the two bins with rocks and toy dinosaurs - big and small.
First, I prepared a double sensory bin - a bigger bin on the outside with a smaller one in the middle. I filled the boundary between the two bins with rocks and toy dinosaurs - big and small.
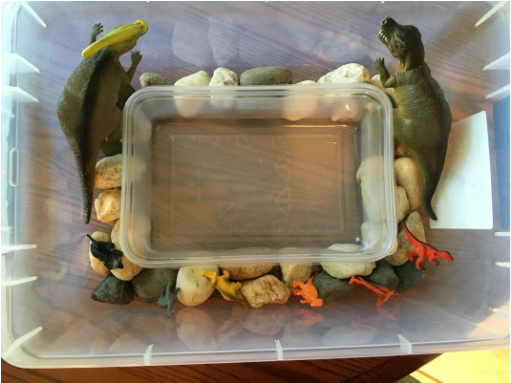
Next came the mud. The STICKY mud. The mud was made from a simple recipe of approximately 2 parts cornstarch and 1 part water. I added some brown food dye to the water before mixing it with the cornstarch, but it really didn't show - the mixture was still quite white.
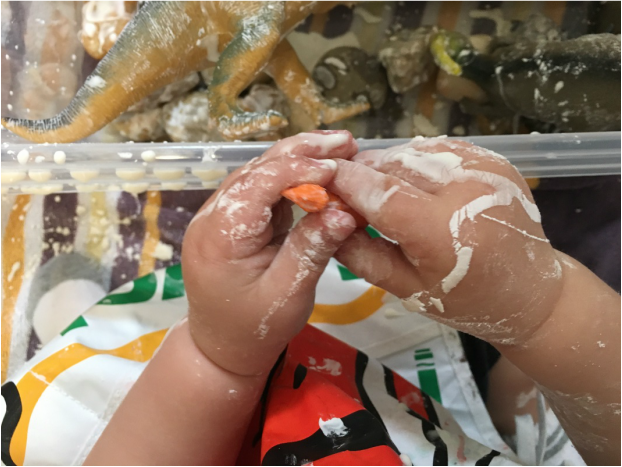
If you are unfamiliar with the mixture of cornstarch and water, it is really an awesome sensory experience - even for adults! This is a "non-Newtonian fluid" which means that it's viscosity changes with the amount of pressure that is applied. Specifically - a cornstarch and water solution is rheopectic, it become hard and thick and behaves like a solid when pressure is applied. But when pressure is absent, it behaves as a liquid again! (There is some fun vocabulary for you!) It was really fun to see my 18 month old figure out that if he just set his hand or a dinosaur on top or gently reached in to pull one out, he was met with little resistance. If he was forceful, however, he couldn't get what he wanted! So this was really both a sensory and problem solving activity. (I didn't get many good pictures of this action because my hands were covered in the mixture!)
If you are unfamiliar with the mixture of cornstarch and water, it is really an awesome sensory experience - even for adults! This is a "non-Newtonian fluid" which means that it's viscosity changes with the amount of pressure that is applied. Specifically - a cornstarch and water solution is rheopectic, it become hard and thick and behaves like a solid when pressure is applied. But when pressure is absent, it behaves as a liquid again! (There is some fun vocabulary for you!) It was really fun to see my 18 month old figure out that if he just set his hand or a dinosaur on top or gently reached in to pull one out, he was met with little resistance. If he was forceful, however, he couldn't get what he wanted! So this was really both a sensory and problem solving activity. (I didn't get many good pictures of this action because my hands were covered in the mixture!)
Hatching Dinosaur (ICE) Eggs
This activity was a super fun way to play with temperature and the process of melting!
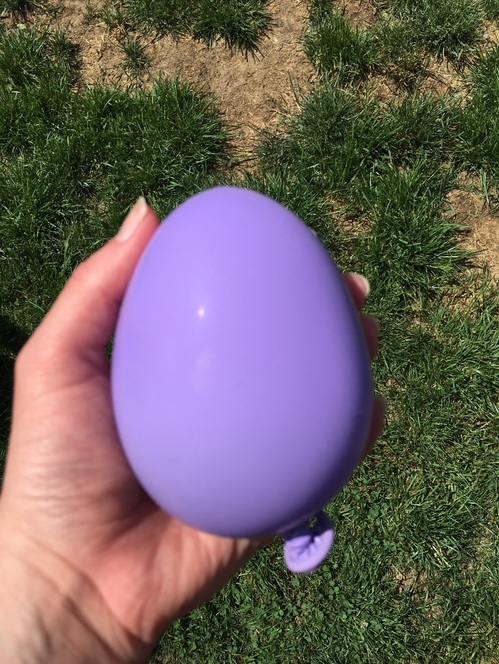
I prepared the "dinosaur egg" by placing a small dinosaur (I used these toys from Target) inside an empty balloon (no picture, as this was definitely a two handed process). I then filled the balloon with water, released any air that was remaining, and tied it off.
I prepared the "dinosaur egg" by placing a small dinosaur (I used these toys from Target) inside an empty balloon (no picture, as this was definitely a two handed process). I then filled the balloon with water, released any air that was remaining, and tied it off.
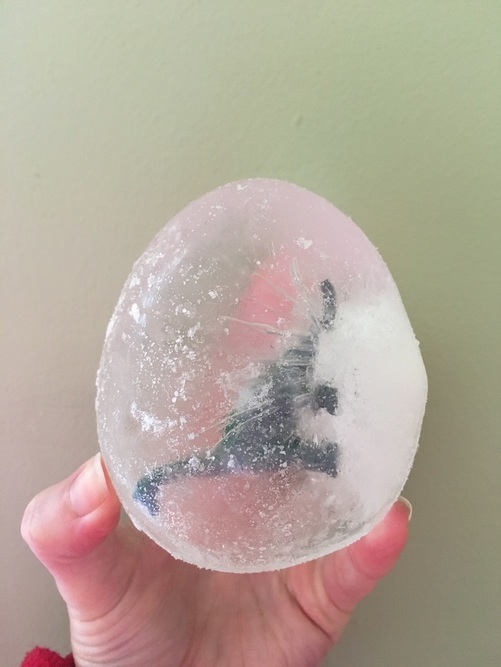
I placed the egg in the freezer for about 24 hours, then cut the tied portion and peeled back the balloon to reveal our "egg."
I put the egg in a small container and gave my toddler a squirt bottle of warm water and showed him how to squirt the egg.

The ice slowly melted away, revealing our dinosaur. This picture shows the dino just before we removed it from the ice.
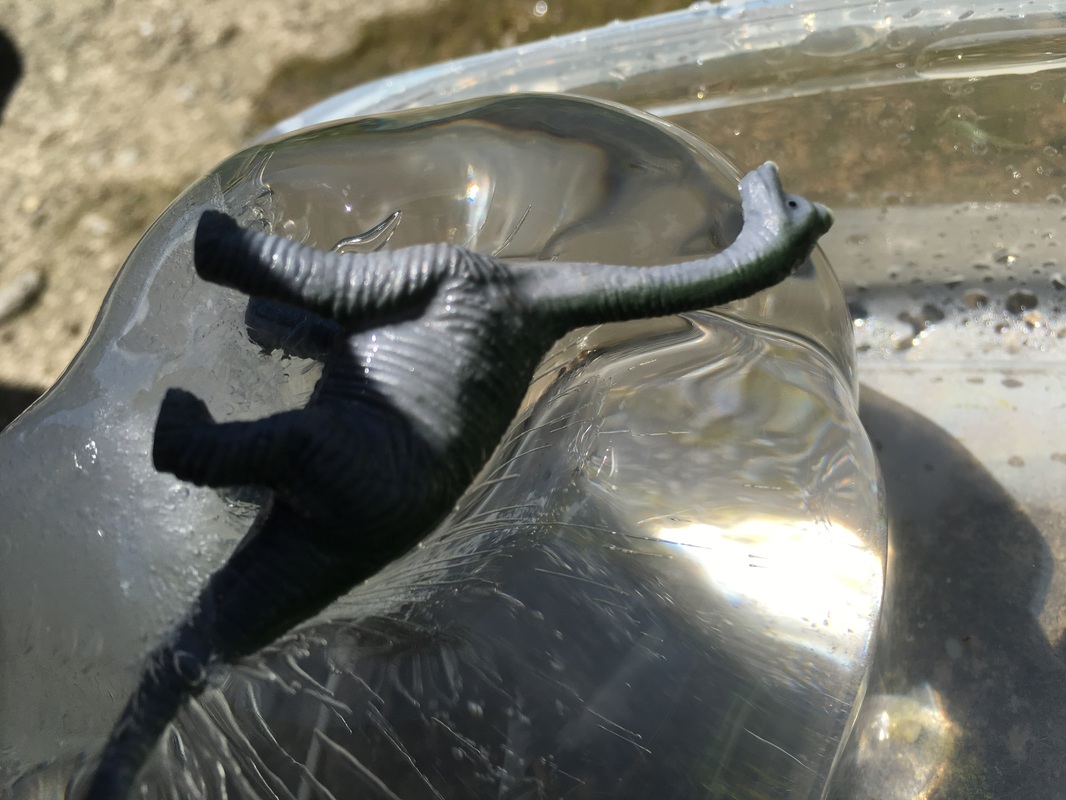
Older kids would probably enjoy using an implement of some sort to chip away at the ice, but I didn't trust my 18 month old with any sort of ice pick-like device. We stuck with the warm water and it worked well. The whole process did not take long, so it held a young toddlers attention well. He also enjoyed playing with the egg and splashing in the water, even after the dinosaur was "hatched."
 RSS Feed
